It's funny, lions and dragons are more similar than you may think. Lions and dragons, you say? What on earth? But yes, you heard right — they are similar! Lions like to hoard things just like dragons do, and this section will tell you all about your hoard so you can enjoy the many things it has to offer!
Navigating Your Hoard
Upon entering your Hoard, you will find a navigation bar. This bar shows not only a manual search where you can look up items in your Hoard by name, but also the different areas of your Hoard. Yes, your Hoard does a lot more than just simply show you the items that you have on hand!
Navigation Bar
As you can see, your Hoard has a handful of different areas to visit. The names of these areas are unique, so let's go over a quick summary of what each of them entails!
- View All: All of the items in your Hoard.
- Buried: All of your buried items.
- Bundles: Currency that you have stored.
- Expiring: Food items that are expiring upon the next Rollover.
- Organization: Mass-select tool for managing your entire Hoard.
- Goodie Bags: Create unique bundles of items (max 10 per bag).
- Crafting: Craft items using items in your Hoard.
- Overview: A list of all the items in your Hoard.
Filtering Items
This is one of the most important features that your Hoard has to offer. It is available in both the 'View All' and 'Buried' sections of your Hoard and allows you to find an item by both category and name. So, how do you use it?
If you know the item that you are looking for by name, you can manually type out the name in the 'Filter: Filter items...' section. You'll have to input at least two letters for this feature to begin filtering your Hoard. As you type out the name, items with like-names will begin to appear, meaning that the item you are searching for may appear before you're even done typing!

To narrow down your search even further, you can use the dropdown menu to select an item category. By selecting a category, only items in that category will be filtered through. Should you not find the item that you are looking for, try typing in the name and selecting the 'All' category. Or, if you're determined to find the category, type in the name and try swapping through the different categories!

Please note that the filter feature remains unique to the section that you are in. Filtered items in the 'View All' section will not appear in the 'Buried' section, and filtered items in the 'Buried' section will not appear in the 'View All' section.
Using Items: Food & Amusement
Using things in your hoard is fairly simple, and most of them have the same layout and actions available, but they do differ a little depending on what you want to do!
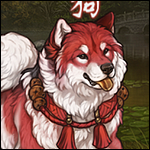
Feeding Your Lions
Feeding and playing with your lions is essential to a healthy, happy pride. After all, you want to be a good king and take care of your pride, right? . . . Right?
First, for this tutorial, make sure your Hoard display setting is set to 'Stacked'. This is your default display setting, and you will know you are using this setting if your 'Display' setting states 'Display: Unstacked' in the top right corner. Yes, what this setting states is the opposite of your current setting, as it's meant to display the setting you will change to upon clicking it!

Now that that's sorted, let's select the 'Food' category from the filter dropdown menu. This will show you all of your current carcasses!

From here, you will then select the kind of carcass you wish to use; this is where your display setting is important! If the carcass you select has more than one stack, then you will be taken to the following page:

As you can see, you will now have a preview of all the individual carcasses of this kind as well as a dropdown of your lions underneath (note that it sorts by which of your lions are the hungriest). Since the feed feature on this page will use the carcass that is expiring the soonest, be careful in case you plan to sell expiring items!
For the sake of this tutorial, the author of this page is okay with this and will be clicking 'Use' after selecting the lion they wish to feed from the dropdown menu. Now that a lion has been fed, some fun flavour text will appear. This flavour text varies depending on the type of carcass used, but it will look something like this:
Now, what if you select an individual carcass, or have your 'Display' setting set to 'Unstacked'? Well, you will instead see this page:

On this page, you will see a few options. However, in terms of feeding, you will select your desired lion from the dropdown and select 'Use'. Note that each time you use a carcass to feed a lion, it will lose a use. So, since this carcass had 5 uses, it will drop down to 4 uses after feeding a lion once. Once an item's uses have all been depleted, the item will be erased from the game.
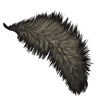
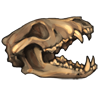
Some carcasses have a chance to drop an amusement item once they are fully depleted of their uses! For a full list of such items, please refer to this page!
Wow, that was easy! Now, since we don't want your lions to be bored, let's go play with them!
Playing With Your Lions
Select 'Amusement' from the filter dropdown menu, and you will then be taken to a page of all of your amusement items. These items can be used to boost your lion's moods and can range from pet rocks to, well . . . don't question it. If it makes your lions happy, then that's what matters!

Now let's select an item from this list, and you will be shown one of two very familiar pages. Like with feeding your lions, you will be greeted with a dropdown menu. This list is organised by your lion's moods, starting with the lowest. Isn't that nice? For the stacked view, you'll see this:

For unstacked view, or when clicking individual items, you'll see this:

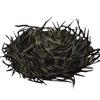
After selecting a lion, click 'Use', and you will be presented with a flavour text that refers to the item that was used. For instance, for the Bat-Eared Fox Tail, it reads the following:
Using Items: Décor
Using Items: Applicators
Using applicators is similar to using everything else in your Hoard, but they come with their own unique twist. To learn how to use one, start by selecting 'Applicator' from the filter dropdown menu. All of your available applicators will appear!

Base, Eyes, Skin, Mane
Let's start by selecting a base, eye, skin or standard mane applicator (not a mane marking applicator).

Now that you've selected an applicator, you will see a handful of options. Since we want to apply it to a lion, you will start by selecting a lion from the dropdown menu. Make sure you double-check which lion you have selected before pressing 'Use'.
After applying the applicator, you will be greeted with some flavour text and a link to view your lion. But, what about other applicators? Well, those have a few extra steps or additional requirements, so let's go over them!
Markings
After selecting your desired marking applicator, you'll be presented with the following page. It has a bit more to it than other applicators!

You'll start by selecting your desired lion; again, be sure to double-check your selection. After selecting a lion, you will then choose a marking slot. The listed slots depend on the lion you have selected, so only the available marking slots will appear. If your lion already has a marking in a slot, that slot will not appear on the list.
Now, depending on the applicator, you may have variations to choose from. Once you have selected your desired variation, input your desired opacity, and then select 'Use'. As with other applicator applications, you will be greeted with a flavour text and a link to your lion.
Some marking applicators, such as a the Random Marking Applicator or the Marking Removal Applicator, will have fewer steps due to only having one possible effect or randomised outcomes.
Mutie on Demand (MoDs)
An applicator that gives your lion a mutation! Let's start by selecting a 'MoD' of your choice to then be taken to the following screen:

Now that we're here, you'll see a dropdown menu. Lions that already have a mutation present cannot have a MoD applied to them, so you don't have to worry about overriding an existing mutation! (Thank goodness for that, right?) After selecting a lion and clicking 'Use', you'll then be greeted with flavour text and, as always with applicators, a link to your lion!
But what if your lion has an existing mutation and you want to change it to a 'MoD' that you have in your inventory? Well, if you have 1000 SB on hand, you can cruise over to Monkey Business and purchase a Safou Fruit. This item will wipe the mutation from a lion of your choice, but do keep in mind that the act of wiping a mutation is NOT reversable, so be sure of your decision.
Poses
Upon selecting a pose applicator from your inventory, you will be greeted with a very familiar dropdown menu. Like with other applicators, you will select your desired lion from the list (if it is applicable for the selected pose), click 'Use', and receive a fun flavour text!

As poses have unique requirements, you will have to check to make sure the applicator you have selected can be applied to your desired lion. Let's go over available poses and their requirements real quick!
- Evil: Female-only, adult-only.
- Good: Female-only, adult-only.
- Jolly: Female-only, adult-only.
- Kind: Female-only, adult-only.
- Neutral: Female-only, adult-only.
- Snarky: Female-only, adult-only.
- Spirited: Male-only, adult-only.
What's that? You want to apply 'Spirited' to a lioness or 'Evil' to a male lion? Well, guess what, you can absolutely do that! For 2 GB you can purchase a Lab Test Frog from the Oasis. This item changes the visible display of your lion (female to male, male to female), allowing you to be able to apply poses to the sex that your lion is currently displaying as.
Poses cannot be applied to lions with an existing unique pose. If your lion already has a pose applied, you will need to remove it. This can be done by purchasing a Pose Remover from Monkey Business for 200 SB.
Please note, it is not recommended to put poses on lions that you intend to make a king later. This is because, upon becoming a king, a lion's ID changes, and the game will recognise them as a brand new lion, which means that their current equipped decors (poses included) will lose a single use. As poses have only a single use, they will permanently disappear, and this won't be able to be reversed. As such, it is recommended to use a pose after you have already made the lion your pride leader!
Burying Items
The neat thing about your hoard is that if you have stuff you don't want to be tempted to use or use accidentally, you can bury things! By burying an item, you will be prevented from using it until it is 'dug up', and it will be completely hidden from your list of available items to choose from when using other site features. You can bury anything in your hoard, but keep in mind that any buried food will still expire.
Pick an item that you want (or an entire stack), and you will be brought to the item or stack screen. Click 'Bury Item' or 'Bury Whole Stack'.

This will then bring you to the 'Buried' section of your Hoard. Within this section you will find that you can filter through your items just as you can in the 'View All' section but you will not be able to click on them. Seriously, unless you buried an item accidentally, you did this for a reason! You put those paws away!

That is, unless you now intend to use an item that you buried. To use a buried item, you have to remove its buried status. Luckily, there are a few different ways that you can do this depending on what all you need to be 'dug up'.
- Dig Up Checked: 'Digs Up' only checked items.
- Dig Up Everything: 'Digs Up' all currently buried items.
You may have also noticed the 'Check All on Page' option. This option checks every buried item visible on the page that you are currently viewing; should you use the filter feature, it will only check the filtered items available on the page that you are viewing!

Putting Items on Your Branch
Looking to potentially make some SB or GB? You can try out selling items via your Branch! To do this, click an individual item and select 'Put On Branch'.

This will give you a notification, which tells you to visit your Branch to set up the price of the item.

Go here for a more in-depth explanation of branches!
Creating Bundles and Goodie Bags
There are a couple of handy ways to organise your assets! Such as storing your currency in Bundles to tuck away for later, or by creating Goodie Bags for yourself or for others.
Bundling Currency
Let's be honest, we've all been tempted to spend our currency even when we've told ourselves we should hold onto it. Thankfully, we have the option to bundle our currency. Putting your SB or GB into a Bundle removes it from your accessible currency and tucks it safely away in your Hoard.
First, click on the 'Bundle' section of your Hoard and you'll be taken to the following screen:

Here you will be able to create, view, and manage your bundles. So, now that you're here, let's create one! Go ahead and give the bundle a name, select the type of currency you wish to bundle, and then input the amount you wish to add to this bundle.

Once you're certain everything looks good, go ahead and click 'Create Bundle'.

Now that you've created a Bundle, it will be visible in your Hoard's 'Bundle' section. You may have also noticed that you have the option to 'Open' the bundle that you just created. If you select 'Open Bundle', the currency within that Bundle will be moved back to your accessible currency, the Bundle will disappear from your Bundle overview, and you will receive a confirmation message.
Bundles cannot be edited. If you wish to add to a Bundle that you have created, you will need to select 'Open Bundle' and then create a new one with your desired amount.
Pretty cool, right? If you can't see it, you won't use it!
Just remember that the buried currency still counts towards your total currency status. This is important for Silver Beetles, because you will stop receiving SB from exploring when you already own at least 5000 SB on your account, even if it's stored within trades or buried in your Hoard!
Creating Goodie Bags
Goodie Bags are a fun way to both store items and create gifts for friends. Let's visit the 'Goodie Bags' section of your Hoard.
Here you'll find the option to create a Goodie Bag. This screen provides you with a list of your assets and the ability to name your Goodie Bag. Go ahead and give it a try! Select up to ten items and fill out a name, then click 'Create Goodie Bag'.

This Goodie Bag can now be found in your Hoard. You can find it by visiting the 'View All' section of your Hoard and typing in 'Goodie Bag'. Or you can visit 'View All', select 'Special Use' from the dropdown menu, and scroll through the pages until you find it.

If you click on the Goodie Bag, it will take you to a screen where you will see the name of the bag and the number of items.

You can also open it from this screen. If you select 'Use', you'll receive a notice of what you received alongside pictures of the items. These items can now be found in your Hoard.
Now you can use the items as you wish, or you can keep the Goodie Bag unopened for a different use!
Crafting
Hoard Overview
Here is where you can see all of the items in your Hoard, including the buried ones! Click 'Overview'.

To search for an item, you can use the dropdown menu. This menu is organised alphabetically and shows the number of uses available for each item. Should you be accessing this tab from a PC, try typing with this dropdown menu open, as it will take you to where an item is on the list. If you are on mobile or are unable to otherwise locate an item, you will have to scroll through the list or browse through the pages!

The neat thing about this overview is that it also shows you the location of an item. If you can't find where an item is, this is a great way to figure out just where it's located.
Organization
This is a mass-select tool for digging, burying, and discarding items; you can also put items on your Branch from here! Go to 'Organisation'.

As you can see, every item in your Hoard is visible (except for Bundles). They're separated by 'Items in Hoard' and 'Buried Items' with both 'Stacked' and 'Individual' categories. In all four sections, you will find a filter option where you can manually input an item name, making items much quicker to find.
Should you wish to 'Bury', 'Discard', or 'Put On Branch' items, you will need to select the items you want to do this with from the lists. If you accidentally select an item, just click it again to unselect it! Once you have your items selected, click the action you wish to take, and you'll receive a notification regarding the completed action.
Please use caution when using the 'Discard' feature. This is an irreversible action, and your item cannot be able to be retrieved. Discarded items go to the Giving Tree.
Display Options
You have various display options available to you. These options control your main view of your Hoard, and they can be changed at any time.
Stacked and Unstacked View

As you can see, if you have multiple items, they will appear under one thumbnail. If you truly just have one of the items, you will see 'uses' listed in the bottom right of the item's thumbnail. In the instance you have multiple, you'll instead see 'stacked'. Click on a stacked item, and it will take you to the unstacked view of that item.
Now, let's try viewing the 'Unstacked' option. Select 'Display: Unstacked'. This will change it so your items are shown individually!

Items Per Page and Sorting
In the filter of your Hoard, you will see 'Display [Number] per page sorted by [Name/Uses].' By using these options, you can further decide how your Hoard is displayed to you. The 'number' portion of this filter decides how many items you see per page, and the 'sorting' option decides the order of your items. For this tutorial, we will be keeping the items per page to 20, but let's take a look at the sorting options!
As the default option is 'name (ascending)', we'll try 'name (descending)'.

Now, instead of your items appearing from A - Z, they now appear from Z - A. That's pretty nice, right? Now, let's select 'uses (ascending)'.

Your items are now displayed from the lowest amount of uses to the highest. Should you wish to view your items with the highest amount of uses, switch it to 'uses (descending)'.

As you've now played around with the available options, go ahead and set them to your preference! The display options that you select do not change upon leaving your Hoard, meaning that you can set them without worrying about having to do them over again!
That's all for now. Go hoard to your heart's content!
This page has been viewed 10006 times.